How to Purchase FormLogix forms – Now starting at 1.99$

FormLogix have just reduced their prices and are giving away discount coupons for those who wish to purchase or renew their FormLogix subscription.

Another great change is that the formLogix form builder has a new free trial version for the period of 60 days. This free account is unlimitted in forms and submissions. Once this trial period is over you will need to purchase a subscription in order to use your email form/s.

Purchasing a form is really easy and is divided in to 2 steps:
A- making a form order in the FormLogix ‘Payment Center’.
B- Making the actual payment in PayPal. FormLogix does not handle its purchase transactions, it does not collect credit card numbers and such, but rather has a third party company – PayPal – do it for her.

There are 3 types of FormLogix subscriptions – you will need to review them in order to choose the most suitable for you:

1- Pay Per Form If you are interested in paying for only one or several forms (while leaving the rest of them in the free version) then this is a suitable option for you. FormLogix are now granting a coupon of ‘up to 50%’ discount to those wishing to purchase a ‘per form’ subscription. You may find this coupon on the FormLogix Facebook page.
Learn more about how to use the discount coupon.

* Please notice that the ‘per form’ subscription enables you to purchase a basic subscription (for the chosen forms) and add, if needed, 2 special features: SSL, File Upload.
If you wish to include these features you will need to turn on their checkboxes while you are making the order and before pressing on the “Buy Now” button.
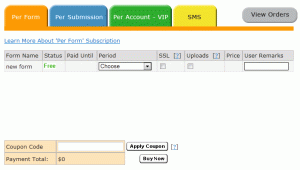
2- Pay Per SubmissionIf you wish to base your subscription on a fixed number of submissions instead of on a certain time period than this is the option for you.
Once you choose this option all the forms in your account will automaticly be included in the paid version. Each time someone fills in one of your forms the number of submissions will reduce by 1.
Please notice that this type of subscription does not include the 2 special features:
SSL, File Upload.

3- Pay Per Account – VIP Subscription
This is an all included, unlimitted paid subscription for your entire account. If you wish to work freely than this is the option for you.
The VIP prices have just reduced and start at a monthly rate of 8.99$ for the period of 12 months.
All you need to do is choose the period of subscription and all your forms will function under the paid version for that period of time.
* This subscription already includes the 2 special features: SSL and File Upload.

Following are steps to make a purchase:
1- Enter the ‘Payment Center’.
2- Choose your subscription by pressing on the relevant tab:
per form – choose the period of subscription for the form/s (1/6/12 months) and turn on the SSL, Uploads checkboxes if necessary.
Per submission- Choose the number of submissions (100/200/500).
Per Account- Choose the subscription period (1/6/12 months)
3- press on the ‘buy now’ button in the relevant subscription section.
4- Once you press this button an order confirmation email will be sent to you from FormLogix – This is only an acknowledgment that your order was received (remember – payment was not even made yet).
4-you will then be redirected to PayPal where you will be required to login and pay.

In addition to the 3 subscription types there is an option to purchase a bulk of SMS’s in order to receive SMS alerts as well as emails. Read more about SMS Alerts.

The current/previous orders made are all stored in the payment history and may be viewed by pressing on the ‘View Orders’ gray button in the payment center.

SMS Alerts

Sms Alerts are a great option for those who are not constantly online, but would still like to be informed all the time. It may be applied to all forms: an order form, a feedback form, a contact form, etc.
When a form filler submits an entry in your web form a new data entry alert email is automatically sent to you by default.
If you wishe to be notified about these new data entry submissions via cell phone you can purchase a bulk of SMS’s and redirect them to your SMS cell phone number.
* Please note that the SMS feature requires the purchase of an SMS bulk and it only applies to all the active forms using this feature in the account.

Following are steps to use the SMS Alerts option:
1) Purchase a bulk of SMS’s in the Payment center.

2) Enter your form in the form creator.

3) Go to the “form settings”.

4) Type your cellphone number in the SMS Number field.
* Take note – You must enter the complete number (the same as when people dial your number from overseas). It should include the country code + cellphone number with no spaces between them.

For example:
if your cell phone number is 054-5874165 and you live in israel (country code=972) than you should enter your number as follows: 972545874165.

5) Press on “apply”.

6) Save the form.

Services | Term of use | Abuse | Partners | Link To Us | Blog | Advertise Copyright © 2005-2010 FormLogix.com All rights reserved

What kind of forms can I create with a form builder?

There is an endless array of web forms you can create very simply using a form builder.
This post will provide several examples of forms, layouts and designs in order to show the variety you can achieve when using the form builder.

1- Contact form
2- Poll/survey
3- Online invitation
4- Event registration
5- Support form
6- Order form

Each form created in the form builder could, of course, be created in other ways (other fields, other field orders, other colors, other fonts, other layouts etc.). In addition each form can be edited after it is finished.

Online contact forms
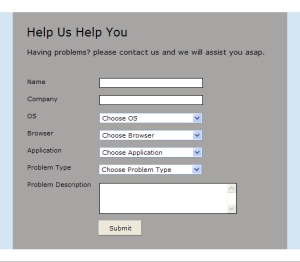
The most common web forms. Help websites/blogs/companies keep in touch with their clients/users. A contact form usually consists of the following fields: name, company, email, phone #, subject, contact purpose, detailed message.

Polls/surveys
A tool used to collect public opinions for research or other purposes.
Usually consist of questions and array of answers the form filler needs to choose from.

Online invitation
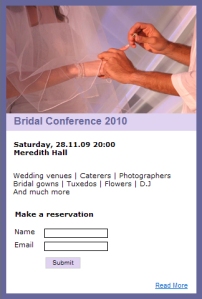
A web form designed to invite users to a certain event (such as a wedding). It usually consists of a visual image and event details (what, when and where). This form also usually collects data which indicates if the form filler intends on attending the event.

Event registration
Large scale events are always well planed and need to be organized. A registration form to an event is one way or organizing it. This form usually consists of fields such as: full name, telephone #, email address, reservation for # of people etc.

Support form
A form dedicated to provide support to users allowing them to contact the website and discuss/ask for assistance/inquire/feedback about different topics.
This form usually consists of these fields: name, email address, contact purpose (technical problem, sales, or other), phone # and description. This kind of form is much like the regular contact form only it emphasizes the support aspect.

Order form
This form is used to collect orders over the web, it does not include the purchase phase. The user fills in the product he/she is interested in and the quantity and the website owner gets in touch with him/her via email/phone in order to complete the purchase.

How to order a FormLogix Form

When registering to FormLogix form builder you are granted 30 days of a trial version after which all the forms shut down (Based on Policy). In order to continue working you need to purchase a FormLogix subscription.
The purchase process in done in 2 phases: the first takes place in the FormLogix website-this is the forms order phase. Once the order is submitted by pressing on the “buy now” button the user is directed to the “payPal” where the actual purchase process takes place.
FormLogix offers 3 kinds of subscriptions:
1- A Per Form Subscription
2- A Per Submission Subscription
3- A Per Account-VIP Submission

Each user has different needs and each subscription is designed to meet these special needs:
1- Per Form – Some users need to create a single form or a few forms which are unlimited in submissions. The suitable subscription in this case is “per form”.
When ordering forms in this type of subscription a form owner is provided with a basic pro version which does not include 2 special features: SSL and File Upload. These 2 features may be added to the basic version when making the order by turning on the feature’s checkbox.
2- Per Submission – Some users need to create a form which is limited in submissions or an unlimited number of forms which they want to purchase submissions for
-This kind of subscriptions is suited for such cases.
The price for this subscription is for a limited number of submissions and does not include the special features: SSL and File Upload.
3- Per account – this kind of subscription is suited for users who need to create an unlimited number of forms and need an unlimited number of submissions as well.
The price covers the entire account and provides an all included pro version of the form builder (including the special features: SSL and File Upload).

Read more about the Form builder Rates

Steps to make a form order:
1- Login to your account.
2- Press on the “Buy FormLogix forms now” green banner to enter the payment center.
3- Choose the relevant subscription for you: per form, per subscription or per account.
4- Choose the period of subscription or number of submissions and press on “buy now”.
5- Make the payment in PayPal

Purchasing FormLogix Forms via PayPal

In order to purchase a FormLogix form builder form you need to:
1- Make a form order on the “FormLogix” website – in the Payment Center (Login Required).
FormLogix does not deal with any part of the purchase process – the form order is made through FormLogix but the purchase itself is only processed by PayPal.
2- Purchase the email form via PayPal.. Once you submit the order yo will be directed to the PayPal website along with the details of the order just made. All you will need to do is login to PayPal and proceed with the payment

For those who are nor familiar with PayPal- here is a helpful link on how to use PayPal:
http://www.mahalo.com/how-to-use-paypal-basics-and-beyond

Creating an online email form

An email form is a form that is configured to collect user data and send it to the form owner via email once the data is submitted in the form.
This kind of form to email is really useful in cases where the form owner needs to be informed when data is entered in his form. Examples for this form are a contact form, a feedback form, an order form, a questionnaire etc.
The email form is a great tool for staying in touch with users, however, some users find this insufficient and need the data in the form to also be stored somewhere and have the ability to manage it.
FormLogix is an email form builder that enables a user to create email forms. Once a form filler submits a form an email containing the data saved is sent to the form owner.
A web database is also set up behind the scenes and enables the form owner to enter the data at any given time in order to view, edit it etc.

Following are email form examples, which contain step by step instructions:
How to create an online invitation
How to create an online order form.
How to create an online purchase form.
How to create a tell a friend form

Creating an online order or purchase form – Part 2: purchase form

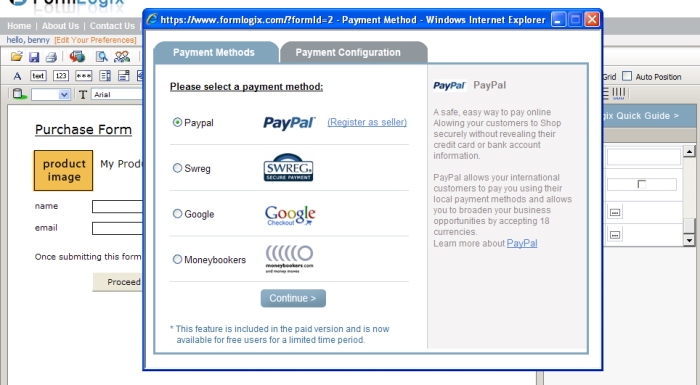
creating a purchase form enables the form owner to sell products online. Since FormLogix does not deal with payment processing at all the only way one can build a purchase form is by using the “Payment Integration” option.
Payment integration is a feature that connects the form to a payment processing company such as PayPal, Moneybookers, Google checkout or Swreg and makes online purchasing possible.

Following are step by step instructions of how to create a purchase form in the form builder:
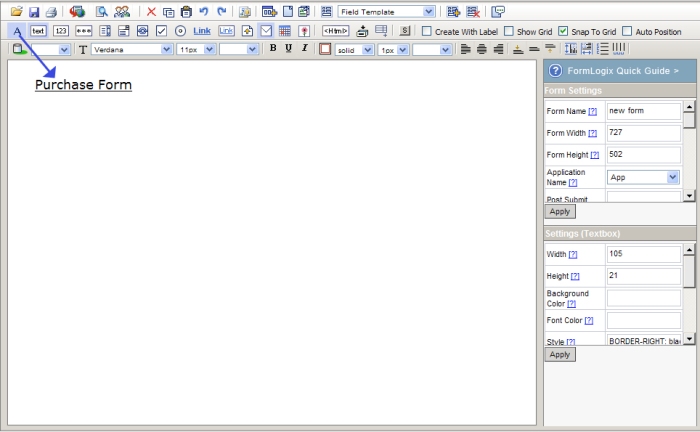
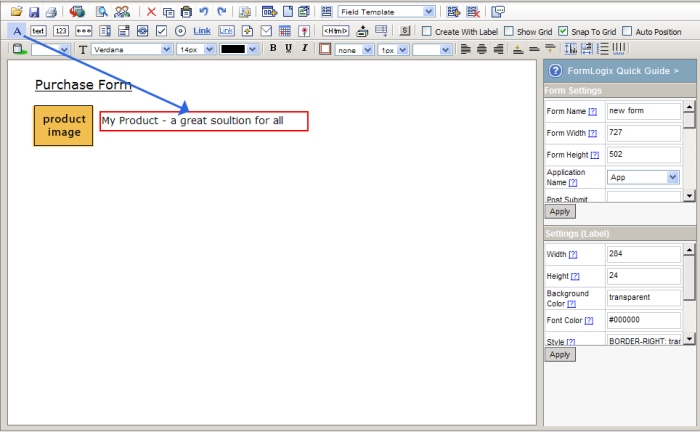
1- Drag a label for the title of the form. Change its text to: Purchase Form
Purchase-title
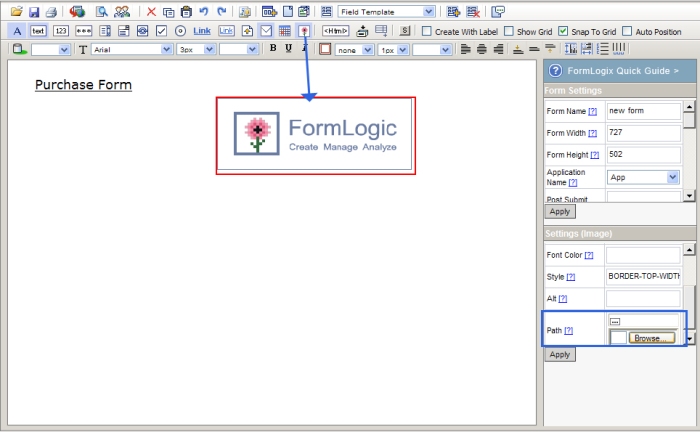
2- Add an image element to show your product. And a label to provide some information about it.
Purchase-image
Purchase-imageText
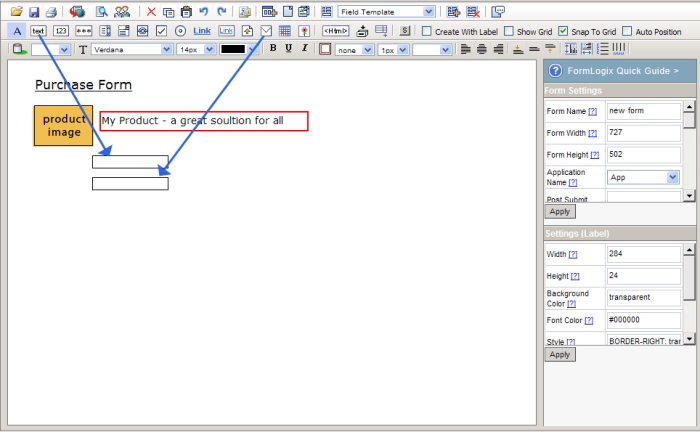
3- Drag a textbox and an email element to collect the user’s name and email address
give each element a tab index number in the “element settings” and a caption.
Purchase-textboxes
4- Drag 2 labels and place each next to an element. Change their text to “name” and “email”
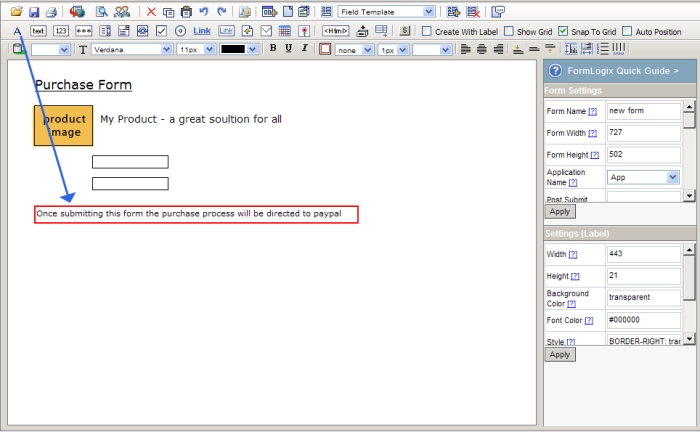
5- Drag a label and use it to explain how the purchase process works in the form (for example: Once submitting this form the purchase process will be directed to paypal.)
Purchase-label-explain
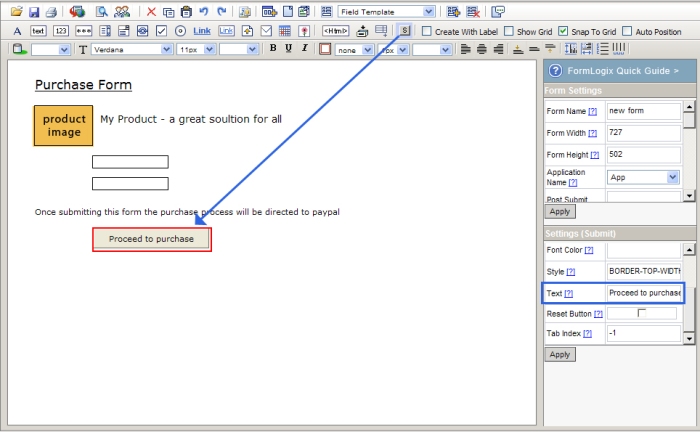
6- Drag a button and change its text in the element settings to “Proceed to purchase”.
product name and price, for instance, already filled in.
Purchase-button
7- Save the email form.
8- Add the purchase component to your form by using the “Payment integration” option.
Open the “payment integration” window from the “form settings”.
Choose the payment processing company from the list so that when your user decides to buy the product he will automatically be directed to the processing website to execute the purchase.
Purchase-Purchase1
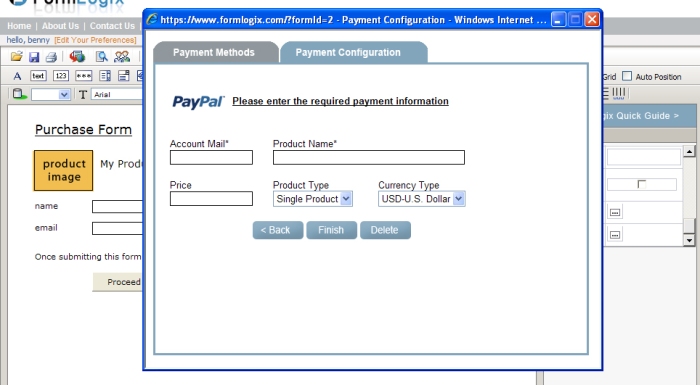
Once you choose a company you will need to fill in the details of your product. By doing so the user will be directed to the executing website along with the details of the product name and price, for instance, already filled in.
Purchase-Purchase2
press on “finish”.
9- Save the form.

Creating an online order or purchase form

In the following post i will discuss the differences between an order form and a purchase form and provide a step by step instruction of how to create a simple order form (I will elaborate on the purchase form in the next post).

Many people have started to collect orders and even sell their products online. In order to add this kind of email form to your website you will probably need to spend a large sum of money to hire a professional programmer. Another alternative, especially for those who do not have any programming skills, is using a form builder.

What is the difference between an order form and a purchase form?
An order form – is a form in which the users choose a product and order it. This form does not deal with the purchasing process at all. Usually the multi-line element is used in this form to collect the info of several items.
A purchase form – a form in which the users can choose the item they want to buy and pay for it online using PayPal/Google checkout/Swreg/Moneybookers. In order to create such a form you have to use the “Payment Integration” option.

Here is a step by step instruction of how to create an order form in the form builder:
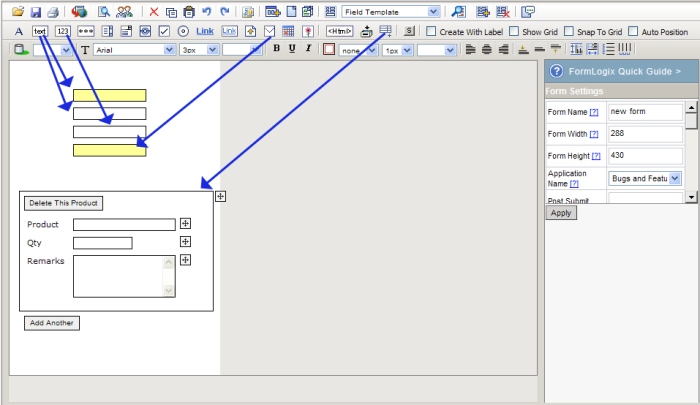
1- drag elements to collect the user’s personal information –
textbox to collect his/her name
textbox to collect his/her address
textbox to collect the phone number
email element to collect the user’s email address
Order-elements

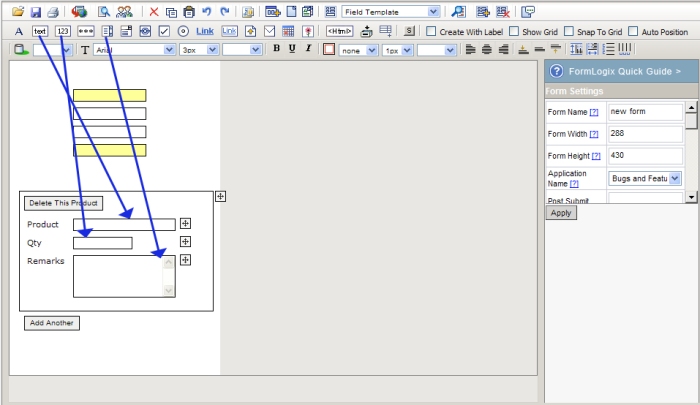
a multiline which contains a textbox for collecting the product name, a numeric textbox for collecting the
quantity of each product and a textarea for collecting free text (remarks).
OrderMultielements
* Don’t forget to give each element a name (element settings>caption) and tab index number (element
settings>tab index).
Read more about the cation
Read more about tab index
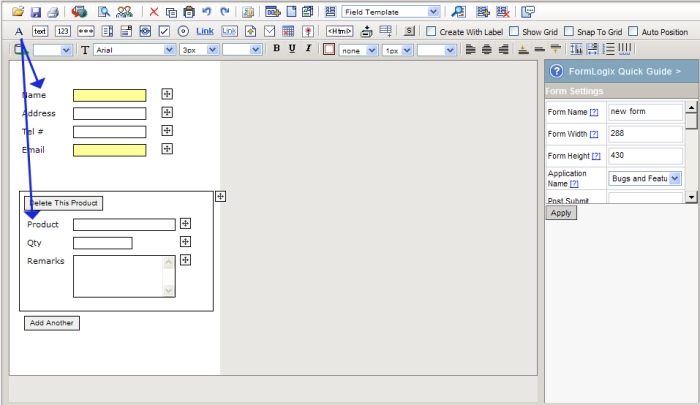
2- Drag labels for each element. Change their text to be same as the element’s name and
place them next to the relevant elements.
Order-labels
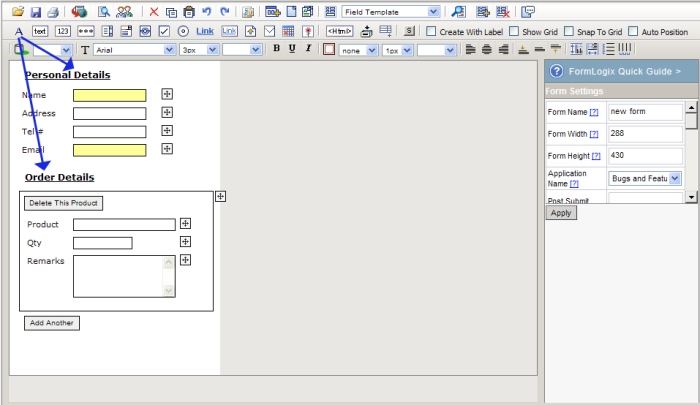
3- Drag 2 labels and create section titles: Personal details and Order details.
Order-titles
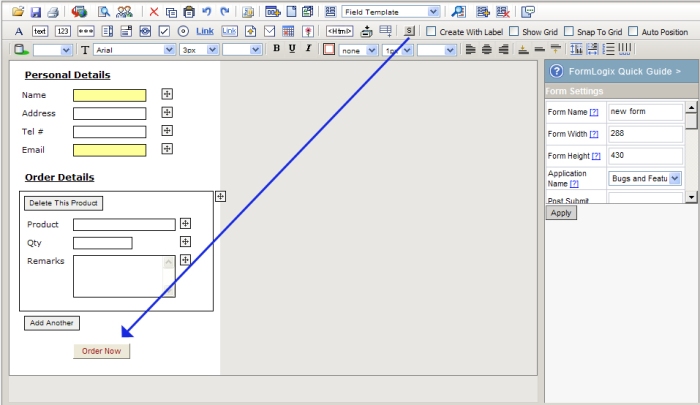
4- Drag a submit button.
Order-submit
5- Design the form (colors, positioning etc)
6- Save the form.

Please tune in for the next post about creating a purchase form.