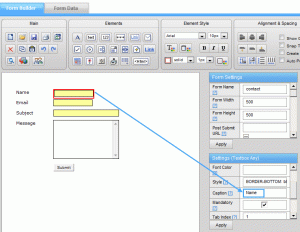
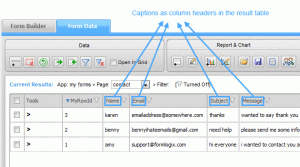
The element’s caption is basically its name. The elements’ captions play a significant role in the form’s functionality since they appear in the data management result table and emails and without them it is sometimes impossible to distinguish between the fields.
When you drag an element for the first time it has a default general name such as: “Checkbox” for all checkboxes or “Radio” for all radio buttons. If these default captions are not changed than when someone fills in your form you will not be able to tell one checkbox apart from another and truly understand the data collected.
Following are steps to change the element caption:
1. Drag an input element on to the design area and make it is selected (has a red border) .
2. Go to its ‘element settings’ on the right.
3. Change the caption text (the caption text is usually the same text as the label attached to the element).
4. Press “apply” and continues to change the other elements’ captions.
5. Save the form.
Filling in the caption text in the form builder:


You must be logged in to post a comment.